Showing posts with label Nikon 14-24mm f/2.8 AFS. Show all posts

2010-03-08

The Blast Furnace - Lithgow

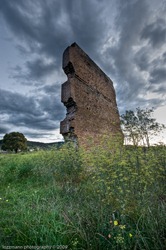
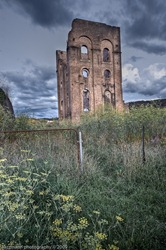
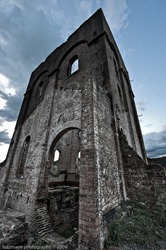
Decided to check out the blast furnace after reading about it in a photography knoll. Looked rather interesting. Left about 3:30 pm in the afternoon for a leisurely 2 hour drive to Lithgow. Get there just in time for a dusk/night shoot.

Drove around Lithgow for a Cafe for a quick dinner and some coffee but just about everything was shut. Hmm, I saw  a sign for Maccas on the way into Lithgow but we couldn’t find it. I stopped and asked a local cab driver for directions. He said that it was about 10 mins down the road on the way out of town.

The cappuccino was horrendous, it was bitter and tasted really odd. I heard the guys on the next table whinging that it was the worst coffee ever. At least the quarter pounder was okay but the fries were yucky!

The Blast Furnace


Blast Furnace Park is a monument to Lithgow's industrial history. It was here that the first iron and steel were cast in Australia. William Sandford established the blast furnace in 1886 and it continued production until 1928 when the entire industry was move to Port Kembla.


LT3_101345_F1_6_7


LT3_101318_19_20LT3_101333_4_5LT3_101313_4_5_6_7_IILT3_101259_60_61_II
All the above are HDR shots. Each shot consist of 3 separate exposures (-1, 0, +1). Tripod used, tone-mapped using Photomatix Pro and tweaked in LR 2.6.

All these shots were taken at around  20:00 hrs. I was eaten alive by mossies but it was worth it.


LT3_101121 LT3_101139

Here are a couple of non-HDR shots. The sun suddenly appeared from behind the clouds. I really liked how the reflected sunlight gave both the building and wall a warm golden glow.


2010-01-11

Cathedral Rocks, Jones Beach, Kiama

I was looking for something new to photograph outside of Sydney. I found

, after about an hour surfing, Cathedral Rocks at Jones Beach, Kiama, a small seaside town  about a  2 hours drive south of Sydney.

Here are some of the shots from my shoot last Thursday. I hope that you will enjoy them.

LT3_100067_68_69_70_71 
This HDR shot consist of 5 separate exposures (-2, -1, 0, +1, +2). Tripod used, tone mapped using Photomatix Pro and tweaked in LR 2.6.

LT3_100072_3_4_5_6
This HDR shot consist of 5 separate exposures (-2, -1, 0, +1, +2). Tripod used, tone mapped using Photomatix Pro and tweaked in LR 2.6.

LT3_100093_4_5
This HDR shot consist of 3 separate exposures (-1, 0, +1). Tripod used, tone mapped using Photomatix Pro and tweaked in LR 2.6. 

LT3_100049_50_51_52_53_54
This HDR shot consist of 5 separate exposures (-2, -1, 0, +1, +2). Tripod used, tone mapped using Photomatix Pro and tweaked in LR 2.6. 

LT3_100104

                                                       ISO 200 | f/8 | 1/200

This is a non HDR shot. It was taken with my Sigma 70-200mm.  I love the texture and details on the rock face. It may not be the sharpest lens around but I am pretty happy with it.

LT3_100237

                                                      ISO 200 | f/16 | 30 secs


This was taken a few minutes just before the sunset. I love the glassiness of the water with the reflections of the rocks. I also love the bluish tones. For some inexplicable reason I did not do a HDR version.

LT3_100248_1

                                                   ISO 200 | f/11 | 240 secs


I had to wait unit the sun was completely down for this shot. It was about 21:00 hrs (9pm). The mosquitoes were out in force. I use my LED head torch to light paint just the face of the two rocks to highlight them.

LT3_09993_100020
This 180° HDR Panorama consist of 8 separate panels, shot in portrait mode. Each panel contains 3 exposures (-1, 0 +1), tripod, tone mapped using Photomatix Pro, stitched together in CS4 and tweaked in LR 2.6. 

2010-01-06

Newport Tidal Pool

Went out to for an evening/dusk shoot at Newport Tidal Pool. I really needed to do more tests with my Cokin X-Pro filter setup. All the shots was taken using 2 x Cokin X-Pro filters stacked. My feet, socks and shoes got a thorough soaking. I just wished the swell was larger and more frequent. The long exposure wave shots would have had more oomph! Should really do this in the early morning when the tide is high.


Newport Tidal Pool


ISO 200 18mm f10 13 secs

This was my favourite shot from the entire shoot. This was taken towards the end of the shoot. I really love how the surface of the tidal pool turned out, so smooth.


HDR

LT3_09220_1_2 LT3_09209_10_11


ISO200 24mm f22 2 secs                       ISO 200 17mm f22 2.5 secs


I also tried a couple of HDR shots. Each shot consists of 3 separate exposures [ -1, 0 +1 ], tripod, tone mapped using Photomatix Pro and tweaked in LR 2.5. I like to keep my HDR as realistic as possible.

LT3_09326

ISO 200 14mm f16 4 secs


LT3_09248

ISO 200 16mm f22 1.6 secs

There was way too much daylight when I was trying to get the long exposure shot of this wave receding. I had to stop down to f22 just to get 1.6 secs.


LT3_09334

ISO 200 16mm f16 15 secs


Panorama


LT3_09168-Edit

ISO 200 14mm f16 1/50 secs

This is a 180° panoramic shot of the beach and the tidal pool. I should have shot this in portrait mode like I normally do. This pano consists of 8 separate shots taken in landscape mode, stitched using CS4 and then tweaked in Adobe LR 2.5.


Newport Tidal Pool - Northern Beaches

2009-10-31

Kirribilli & Milson’s Point

I wanted to do a night shoot and try my hand at doing night panoramas, night HDR and some long exposure shots of anything spinning with coloured lights, e.g. Ferris wheel at night. The only Ferris wheel I know of is at Luna Park, Milson’s Point. As luck would have it, just as we setup for the shot, the Ferris wheel stopped rotating and closed for the night.


LT3_06761-Edit_filtered

I took 3 exposures for this HDR (-1, 0, +1). I then tone mapped with Photomatix Pro. The water did not come out very well, there was some noise in the shadow areas. I selected an exposure that had the best reflections and brightest colours in the water. I imported into CS4 as a layer, added a mask and with a very soft brush with an opacity of around 50%, carefully painted out the bits of the water that  did not look good.  

LT3_06831-Edit


Selective colouring, I exported it from LR 2.5 to CS4 and duplicated it. I converted top layer image to BW and I applied a mask to it. Using my Wacom tablet I set the opacity set to about 50%, selected a big soft brush. I then slowly painted out just the puddle of water to reveal the colours of the bottom layer.


LT3_06842


This one was taken from Milson’s Point adjacent to Luna Park’s Ferris wheel. This is actually 2 exposures blended together. The 2 towers of the Luna Park entrance were badly blown out when I used matrix metering.  I selected 2 exposures and exported them to CS4 as layers. I applied a mask and painted out the sky and water on the top layer to reveal the colours from the layer beneath.

LT3_06796-Edit


Lastly, I did a 180³ night panorama. I decided that the best spot to create the panorama was from Kirribilli which will includes the Sydney Opera House, the city skyline and Sydney Harbour Bridge. It was a real shame that some of the lights on the bridge were not working. This panorama consisted of 8 individual shots taken in portrait mode, stitched together with CS4 and tweaked in LR 2.


2009-09-04

Cokin X-Pro Filter Rig - Mark II - Nikon 14-24mm

Issues with the original Filter "rig" design

  1. it was too cumbersome trying to to attached the universal ring using the 4 screws to the rig. It was near impossible to get filter holder dead center relative to the lens.

  2. Unless you can get the 4 screws just right, each time, the universal ring will always be off, therefore, the filter holder will not be dead center relative to the lens. I also wanted the filter holder to sit perpendicular to the lens and not leaning slightly forwards or backwards.

  3. I wanted to come up with a solution that I could get my Cokin X-Pro filter system on and off the 14-24mm lens quickly with a minimum of fuss.

Requirements for new “rig” design

Slide the rig backwards or forwards, to minimised vignetting, depending on whether I just want to use a single filter or stack a couple of filters.

Reorient the filter holder, quickly, when going from landscape to portrait mode or vice versa, especially when using ND graduated filters.

The ad-hoc piece of foam I used to stop light leakage through the gap between the rig and the universal adapter was not very elegant. I wanted it to be integrated into the rig, one less item to worry about and less likely to forget when packing for a shoot.

I measured and found that the "rig" was between 1-1.5 mm in diameter larger than the Nikon 14-24mm lens hood. I tried looking for Teflon sheets 1mm in thickness from Clark Rubber and Bunnings without any luck.

Whilst browsing through Eckersley's Arts and Crafts store I came across a piece of A4 acetate sheet, with a thickness of about 0.25 mm, that looked like it might do the job. Since I could not find anything suitable with the required thickness. I figured I could make one by gluing 2-3 strips together to get the required 1.5mm thickness to use as a shim so that the "rig" can slide onto the lens properly and not slip off.
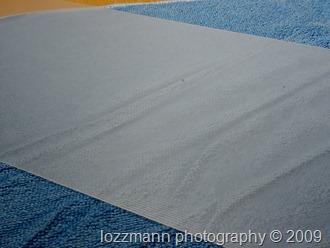
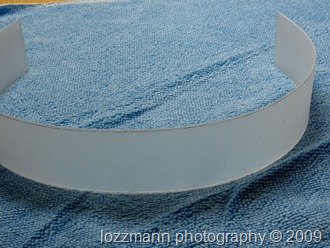
LTC_01314

LTC_01310 2x40mm plastic/acetate strips


I cut 2 x 40mm strips and glued them together using some spray adhesive. I left it overnight to set. I then form the strip of acetate into a circle and fitted it into the "rig" and marked the exact length required and cut it to length using a Stanley knife. Next time I would glue the plastic strips one at a time separately.
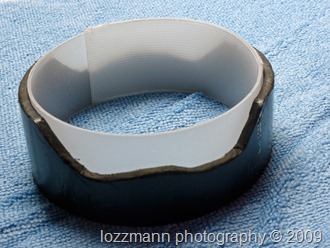

LTC_01306 Double checking that the strip fits


Next I clean the inside of the "rig" before spraying it with adhesive. I also sprayed a generous coating of adhesive onto the back of acetate strip, waited for a couple of minutes until the adhesive got tacky. I then carefully placed the strip onto the inside of the rig making sure that everything is align before pressing down harder. I again used some low tack masking tape to hold in place whilst the adhesive set overnight.


LTC_01315 low tack masking tape to hold in place overnight


I tried the rig on the lens the next day and and it was a tight fit and in fact too tight as it took me over 20 mins to get the rig off again.


LTC_01341


Luckily, I was able to ripped the third strip off and just cut 2x much smaller strips to fit just for the widest part of the rig. The fit is much better as I am now able to slide the rig on and off the lens easily.


LTC_01381


Next is to build up the circumference of the rig so that the universal adapter can be mounted directly onto the rig without having to use the 4 screws. I quickly measured the size difference between the rig and the universal adapter. So I needed about an additional 5mm of girth on the rig.
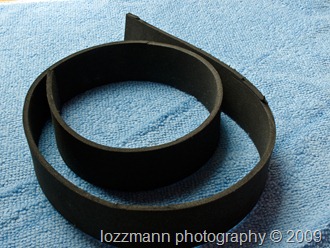
 

LTC_01354

2mm thick medium density foam strip


I used 2 x 40mm acetate strips and adhered them onto the outside of the rig one at a time then taped them up and left it overnight to set. The next day I glued a 40mm of medium density foam strip, cut to length, on top of the acetate strips. I used low tack masking tape to hold it place and left it overnight.


LTC_01350 Medium density foam and acetate strips glued onto the outside of the rig


Next day I glued another strip of 40mm acetate onto the foam. I used low tack masking tape to hold it place and left it overnight to set.


LTC_01359


The acetate sheet had a nice combination of rigidity and flexibility. The piece of A4 acetate had grooves on one side and smooth on the other. I chose to glue them on the grooved side so the smooth side will aid the "rig" to slide on and off the lens easier.


LTC_01356


By sandwiching the foam between the acetate strips gives it additional mechanical strength and rigidity.

The acetate strip on top of the foam is to make it easier for the universal adapter to slide on as it has less friction than the foam strip. Also when the universal adapter is pushed onto the rig, the "springy" foam should push up against it and provide a tight seal to block out the any light from behind thus preventing it from reaching the filters.


LTC_01366


I use my Dremel to trim and shape the foam and acetate to follow the contours of the rig. Remember to let the blade do the cutting and don't apply force on the Dremel to get it to cut faster.

LTC_01373

It should take about 20-30 minutes to complete. I also use a miniature rasp file to get rid of any little burrs and rough edges. Also wear safety goggles as there bits of plastic and foam flying around at high speed.


LTC_01377

Next I pushed the Cokin X-Pro holder with universal adapter ring attached onto the rig. A nice tight fit with the “springy” foam pushing up against the adapter ring giving it a nice gapless fit to block any stray light from reaching the filters.
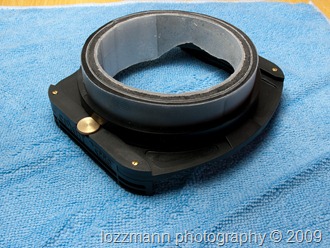
 

LTC_01378

Next I slipped the rig with the Cokin X-Pro holder onto my 14-24mm lens. I also made sure that I could slide it backwards and forwards along the lens with ease. This is to minimise vignetting depending on whether I am using 1 or 2 filters.

LTC_01396

LTC_01402

I then installed my Cokin ND8 Grad filter into the holder and made sure there was no vignetting at 14mm.  This involved taking multiple shots at 14mm and viewing at 100% on my Dell 24” screen to make sure.


LTC_01407


If you loosen the brass screws on either side of the holder you can easily rotate the Cokin X-Pro holder. Great for when you are switching from landscape to portrait mode or vice-versa, especially when you are using a ND Grad filter.

LTC_01410


Front and side view of the ND8 Grad filter and Cokin X-Pro holder attached to my Nikon D700. Please excuse the mess in the background.

LTC_01413


Out on location for testing with his best mate the Canon 5D. If you own the 16-35mm Mk. II lens, you won’t have an issue with the Cokin X-Pro filter holder like I did. Cokin has an 86mm adapter to screw onto the front of this lens.

LTC_01424

In this setup I had 2 x filters (Cokin ND4 and ND8 Grad) stacked for testing. I managed to get up to 17mm without vignetting using the 2 x filters. With just a single filter I was able to get 14mm with zero vignetting on my Nikon D700 which is a FX or full frame DSLR.


Examples

Here are some examples shots using the Cokin X-Pro filters. The first shot was taken using just the Cokin ND8 Grad filter. The second shot was taken by stacking two filters (Cokin ND4 and ND8 Grad).

Bronte Beach


LT3_04119

Details: ISO 200 | 14mm | 10s @ f/22 – Using 1 x Cokin ND8 Grad. filter.

Mona Vale Beach
LT3_05752-Edit
Details: ISO 200 | 17mm | 2.5s @ f/22 – Stacked Cokin ND4 & ND8 Grad. filters.
2009-08-08

DIY Cokin X-Pro Filter Rig for Nikon 14-24mm

Check out my new and improved DIY filter "rig" design. Click here.


This is a home-made filter rig for my Nikon 14-24mm lens. The design came about because I didn't want the universal adapter to scratch the hood of the 14-24mm lens.

It consists of a 100mm PE or polyethylene pipe, its black and is generally used for waste. I managed to get a piece of off-cut from a plumber mate. You can't find this at Bunnings, you need to visit a proper plumbing supply store.

I cut a 35mm piece of pipe for the universal adapter to clamp onto. I then sculpted the piece of pipe to the contours of the hood using my Dremel. The PE pipe is very soft so its not too hard to do. This has to be done otherwise you will see it on an FX camera, like my D700.


I also used strips of stick on foam to ensure a snug fit onto the lens and to minimise movement. You can buy them from Clark Rubber, you can buy them cut to length so its cheap, only costs me a couple of bucks.


Here are a couple of shots of the universal adapter and filter holder mounted onto the "rig"


Here is a shot of the filter "rig" mounted on my Nikon 14-24mm.


Here are a couple of shots of the filter rig with the Cokin X 121 installed.

Check out my new and improved DIY filter "rig" design. Click here.


Ok, you can see that there is a gap between the "rig" and the universal adapter. This gap needs to be blocked otherwise light coming from the back will ruin your photos.


This what happens if you don't block the gap. Can see the circle of light?


I used a piece of packing foam from a power supply I bought to fix my nephew's PC. Using a Stanley knife I cut a circle using the "rig" as the template. I am in the process of spraying it black. I have only managed to do the first coat, a couple more coats should do the trick.

I've been very happy with the results from my testing, there is zero vignetting at 14mm when using just one filter. However, the results have not been great when I try stacking 2 filters together. Most of the time I am able to just see the top right hand corner of the X-Pro filter holder. I think this is because I am not able to clamp the the filter holder squarely onto the "rig". A bit more tweaking to the "rig" should resolve this issue.

It is not the most elegant solution but I am still in the process of refining the design. If any of you guys reading this has a good idea please let me know. Chris and Vince, I hope this will help you guys get started.


Cokin has release a new universal adapter specifically for the Nikon 14-24mm. This wasn't around when I bought my one. Thanks for that Miha.

Here are some of my test shots from Warriewood Beach and Turrimetta Beach

Check out my new and improved DIY filter "rig" design. Click here.