2009-11-11

Eden Gardens | North Ryde | Sydney


Nikon D700 – Low Light, High ISO Macro Photography


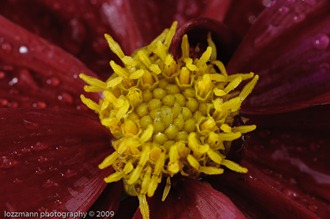
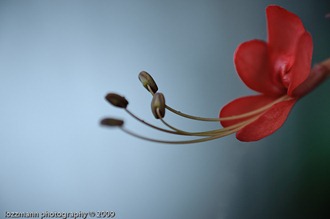
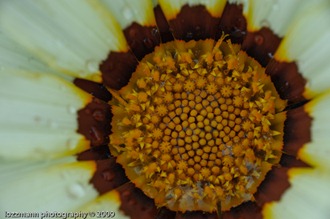
Decided that my hand-held macro technique needed some “brushing up” this weekend. It has been awhile since I did any macro photography and as they say practice makes perfect! I never use a tripod for macro as I find it inconvenient and I am too lazy to cart a tripod around anyway.

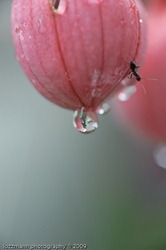
It was showering all Sunday morning so I just waited in the cafe sipping cappuccino until it stopped. Anyway, the shower was a bonus really with all that water droplets on the flowers makes for great macro photography!


LT3_07428

Shot hand-held with Nikon D700 + Nikon 105mm f/2.8 AF Micro
ISO 320 | f/11@1/320 | No Flash


LT3_07420 

Shot hand-held with Nikon D700 + Nikon 105mm f/2.8 AF Micro
ISO 400 | f/11@1/250 | No Flash


LT3_07527

Shot hand-held with Nikon D700 + Nikon 105mm f/2.8 AF Micro
ISO 1600 | f/8@1/200 | No Flash

Majority of my macros shots are 1:1, it took awhile to get the technique down pat but now I have quite a good hit rate for sharp macro shots. I need to work on my insects macro shots, especially bees. I have not gotten a bee macro that I have been totally happy with.


LT3_07407 
Shot hand-held with Nikon D700 + Nikon 105mm f/2.8 AF Micro
ISO 400 | f/16@1/500 | Flash

LT3_07498-Edit 
Shot hand-held with Nikon D700 + Nikon 105mm f/2.8 AF Micro
ISO 1600 | f/8@1/400 | No Flash

LT3_07483
Shot hand-held with Nikon D700 + Nikon 105mm f/2.8 AF Micro
ISO 640 | f/11@1/30 | No Flash

LT3_07512
Shot hand-held with Nikon D700 + Nikon 105mm f/2.8 AF Micro
ISO 1600 | f/8@1/250 | No Flash


This weekend I decided to shoot at a higher ISO than normal just to see what the results would be like. I also didn’t use any flash for the majority of the shoot. I think that they were okay up until about ISO 640 after that they where a bit furry when viewed at 100%.


LT3_07572

Shot hand-held with Nikon D700 + Nikon 105mm f/2.8 AF Micro
ISO 1250 | f/9@1/640 | No Flash

LT3_07413
Shot hand-held with Nikon D700 + Nikon 105mm f/2.8 AF Micro
ISO 400 | f/16@1/500 | Flash


LT3_07424

Shot hand-held with Nikon D700 + Nikon 105mm f/2.8 AF Micro
ISO 320 | f/11@1/320 | No flash

Overall, I was happy the results from this weekend. I am interested in getting the Nikon R1 Close-up Speedlight Remote Kit. My current home brewed macro rig consists of 2 x SB-800s which can get pretty heavy after awhile. A lighter load would provide more stability and greatly improve my chances of obtaining sharper and crisper macros shots.

2009-11-07

Sculpture by the Sea - 2009

Sculpture by the Sea is largest annual free-to-the-public outdoor sculpture exhibition in the world. It stretches from Tamarama Beach to Bondi Beach along the 2km Bronte to Bondi Coastal Walk. 


I attended  this year’s Sculpture By The Sea. In hindsight I should have waited a couple of weeks before attending as there way too many people. Next year, I am planning to go early, before sunrise, to capture the magical light with no crowds or other photographers in the way.


This year, I decided to bring along both my Canon G10 and Nikon D700 as I was not keen on carrying around a “heavy” Sigma 70-200mm and I didn’t really want to change lenses all day long. Besides the Canon G10 doesn’t get out much.


Canon G10

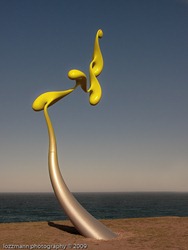
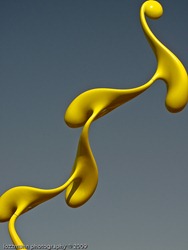
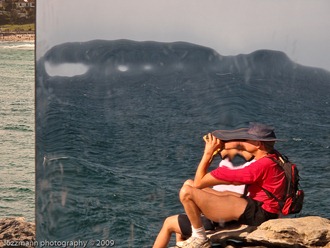
This was my favourite sculpture, it was just mesmerising. The strong wind  kept it in constant motion morphing into different shapes. The movement was both fluid and rapid so trying to frame the shot accurately was rather tricky.

LTC_01486-Edit LTC_01481

                            Morpheus #1                                                     Morpheus #2


LTC_01478 

                                                                Morpheus #3

LTC_01557

LTC_01526

LTC_01523 LTC_01524

The flags were amazing, thank god the wind was so strong otherwise this display would have been a dud. I enabled ND filter on the Canon G10 to get slower shutter speed so I could get some movement with the flags rather than just freezing them.


LTC_01546 

What is it with storm water drain and kids? I used to do the exact thing when I was a kid many moons ago. The above series of shots were all taken with my Canon G10. I am more than  happy with the results, the colours were just amazing SOOC. By the way, all these were shot as jpeg and not raw.


Nikon D700

  LT3_07375_6_7-Edit_Textured2 LT3_07366-Edit-2_textured

                                                                                           Dying For A Drink

3 x exposure HDR (-1, 0, +1), hand-held, tone mapped using Photomatix Pro.

Texture added in CS4 and then tweaked in Adobe LR 2.5.

The second photo only had the texture added in CS4 and then tweaked in Adobe LR 2.5.

Both t

extures were supplied by

virtually_supine - Thank you.


LT3_07257-Edit 

Morpheus #4 -  mesmerising visitors


LT3_07202 LT3_07193

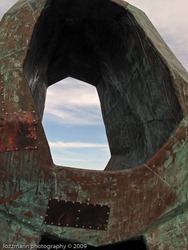
        Transfiguration "screw" IX'                                       Subterfuge


LT3_07262 
LT3_07263 

LT3_07233_4_5 LT3_07230

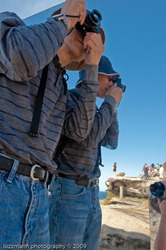
                                A couple of hard core Canon shooters


LTC_01467

Warped


The Nikon D700 performed flawlessly as usual. Perhaps the Nikon 24-70mm would have been more suitable for this shoot. I will just add that to my wish list.

2009-10-31

Kirribilli & Milson’s Point

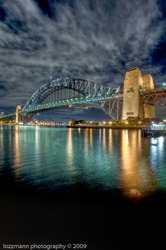
I wanted to do a night shoot and try my hand at doing night panoramas, night HDR and some long exposure shots of anything spinning with coloured lights, e.g. Ferris wheel at night. The only Ferris wheel I know of is at Luna Park, Milson’s Point. As luck would have it, just as we setup for the shot, the Ferris wheel stopped rotating and closed for the night.


LT3_06761-Edit_filtered

I took 3 exposures for this HDR (-1, 0, +1). I then tone mapped with Photomatix Pro. The water did not come out very well, there was some noise in the shadow areas. I selected an exposure that had the best reflections and brightest colours in the water. I imported into CS4 as a layer, added a mask and with a very soft brush with an opacity of around 50%, carefully painted out the bits of the water that  did not look good.  

LT3_06831-Edit


Selective colouring, I exported it from LR 2.5 to CS4 and duplicated it. I converted top layer image to BW and I applied a mask to it. Using my Wacom tablet I set the opacity set to about 50%, selected a big soft brush. I then slowly painted out just the puddle of water to reveal the colours of the bottom layer.


LT3_06842


This one was taken from Milson’s Point adjacent to Luna Park’s Ferris wheel. This is actually 2 exposures blended together. The 2 towers of the Luna Park entrance were badly blown out when I used matrix metering.  I selected 2 exposures and exported them to CS4 as layers. I applied a mask and painted out the sky and water on the top layer to reveal the colours from the layer beneath.

LT3_06796-Edit


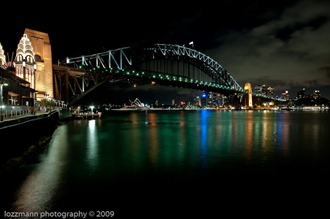
Lastly, I did a 180³ night panorama. I decided that the best spot to create the panorama was from Kirribilli which will includes the Sydney Opera House, the city skyline and Sydney Harbour Bridge. It was a real shame that some of the lights on the bridge were not working. This panorama consisted of 8 individual shots taken in portrait mode, stitched together with CS4 and tweaked in LR 2.


2009-10-04

Acratech Levelling Base

The main reason I bought this was to do panoramas. I was sick of spending up to 10 minutes trying to get the tripod level for each pano shot. Now it just takes literally takes less than 10 seconds to get both my tripod base and my ballhead dead level.


The built quality is excellent, nice anodised finish and best of all only weighs about 250g. I really love the huge round spirit level as it makes it so easy to get the tripod level accurately and quickly.

Check out the large round spirit level


The large knob makes it so easy to loosen and tighten the levelling base. It also has a nice rubberised coating on it.


Love the large rubberised knob


Another view of the levelling base, as you can see the workmanship and finish is of a high standard.

Excellent build quality and finish

I have used it for a couple of weeks now and I am very happy with it. It is no longer a chore to take multiple pano shots as the levelling base makes it so easy to move around. With a level tripod it get rids of the staircase effect giving you more of the photo with little or no cropping required and perfect seamless stitching.

I can highly recommend the Acratech levelling base to anyone. At $150 USD I reckon it is money well spent.

Examples


Here are some of the panos from my testing of the Acratech levelling base.


Sydney Opera House - This 180° HDR Panorama consist of 7 separate shots in portrait mode. Each shot contains 3 exposures (-1, 0 +1), tripod, tone mapped using Photomatix Pro, stitched together in CS4 and tweaked in LR 2.0

View of Circular Quay from the Sydney Opera House - This 180° HDR panorama consists of 7 separate shots in portrait mode. Each shot contains 3 different exposures (-1, 0 +1), tripod, tone mapped using Photomatix Pro and stitched together using CS4 and tweaked in LR 2.0

Campbells Cove, Sydney, Australia - This 360° Panorama consists of 15 separate shots in portrait mode and stitched together using CS4 and tweaked in LR 2.0


Here is my pano setup - The Acratech Levelling base attached to my Really Right Stuff BH-40 ballhead with a Really Right Stuff nodal rail.


Go here for more info on the Acratech levelling base.

2009-09-04

Cokin X-Pro Filter Rig - Mark II - Nikon 14-24mm

Issues with the original Filter "rig" design

  1. it was too cumbersome trying to to attached the universal ring using the 4 screws to the rig. It was near impossible to get filter holder dead center relative to the lens.

  2. Unless you can get the 4 screws just right, each time, the universal ring will always be off, therefore, the filter holder will not be dead center relative to the lens. I also wanted the filter holder to sit perpendicular to the lens and not leaning slightly forwards or backwards.

  3. I wanted to come up with a solution that I could get my Cokin X-Pro filter system on and off the 14-24mm lens quickly with a minimum of fuss.

Requirements for new “rig” design

Slide the rig backwards or forwards, to minimised vignetting, depending on whether I just want to use a single filter or stack a couple of filters.

Reorient the filter holder, quickly, when going from landscape to portrait mode or vice versa, especially when using ND graduated filters.

The ad-hoc piece of foam I used to stop light leakage through the gap between the rig and the universal adapter was not very elegant. I wanted it to be integrated into the rig, one less item to worry about and less likely to forget when packing for a shoot.

I measured and found that the "rig" was between 1-1.5 mm in diameter larger than the Nikon 14-24mm lens hood. I tried looking for Teflon sheets 1mm in thickness from Clark Rubber and Bunnings without any luck.

Whilst browsing through Eckersley's Arts and Crafts store I came across a piece of A4 acetate sheet, with a thickness of about 0.25 mm, that looked like it might do the job. Since I could not find anything suitable with the required thickness. I figured I could make one by gluing 2-3 strips together to get the required 1.5mm thickness to use as a shim so that the "rig" can slide onto the lens properly and not slip off.

LTC_01314

LTC_01310 2x40mm plastic/acetate strips


I cut 2 x 40mm strips and glued them together using some spray adhesive. I left it overnight to set. I then form the strip of acetate into a circle and fitted it into the "rig" and marked the exact length required and cut it to length using a Stanley knife. Next time I would glue the plastic strips one at a time separately.


LTC_01306 Double checking that the strip fits


Next I clean the inside of the "rig" before spraying it with adhesive. I also sprayed a generous coating of adhesive onto the back of acetate strip, waited for a couple of minutes until the adhesive got tacky. I then carefully placed the strip onto the inside of the rig making sure that everything is align before pressing down harder. I again used some low tack masking tape to hold in place whilst the adhesive set overnight.
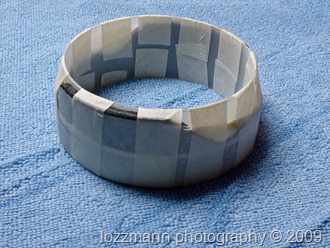


LTC_01315 low tack masking tape to hold in place overnight


I tried the rig on the lens the next day and and it was a tight fit and in fact too tight as it took me over 20 mins to get the rig off again.


LTC_01341


Luckily, I was able to ripped the third strip off and just cut 2x much smaller strips to fit just for the widest part of the rig. The fit is much better as I am now able to slide the rig on and off the lens easily.
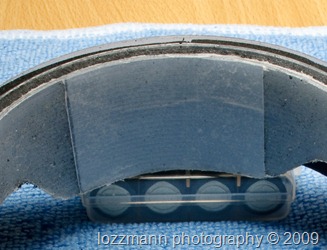
 

LTC_01381


Next is to build up the circumference of the rig so that the universal adapter can be mounted directly onto the rig without having to use the 4 screws. I quickly measured the size difference between the rig and the universal adapter. So I needed about an additional 5mm of girth on the rig.


LTC_01354

2mm thick medium density foam strip


I used 2 x 40mm acetate strips and adhered them onto the outside of the rig one at a time then taped them up and left it overnight to set. The next day I glued a 40mm of medium density foam strip, cut to length, on top of the acetate strips. I used low tack masking tape to hold it place and left it overnight.
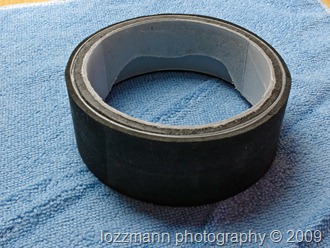


LTC_01350 Medium density foam and acetate strips glued onto the outside of the rig


Next day I glued another strip of 40mm acetate onto the foam. I used low tack masking tape to hold it place and left it overnight to set.
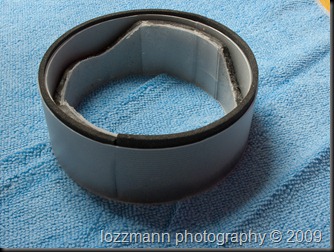
 

LTC_01359


The acetate sheet had a nice combination of rigidity and flexibility. The piece of A4 acetate had grooves on one side and smooth on the other. I chose to glue them on the grooved side so the smooth side will aid the "rig" to slide on and off the lens easier.
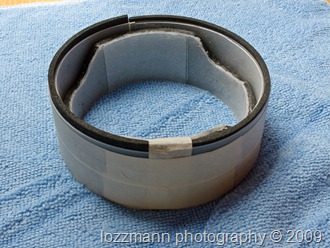
 

LTC_01356


By sandwiching the foam between the acetate strips gives it additional mechanical strength and rigidity.

The acetate strip on top of the foam is to make it easier for the universal adapter to slide on as it has less friction than the foam strip. Also when the universal adapter is pushed onto the rig, the "springy" foam should push up against it and provide a tight seal to block out the any light from behind thus preventing it from reaching the filters.
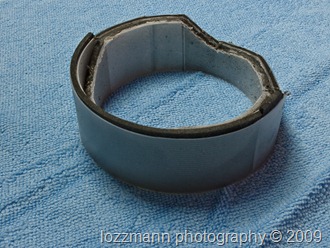
 

LTC_01366


I use my Dremel to trim and shape the foam and acetate to follow the contours of the rig. Remember to let the blade do the cutting and don't apply force on the Dremel to get it to cut faster.
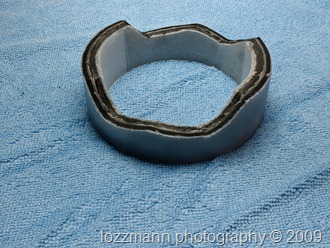
LTC_01373

It should take about 20-30 minutes to complete. I also use a miniature rasp file to get rid of any little burrs and rough edges. Also wear safety goggles as there bits of plastic and foam flying around at high speed.
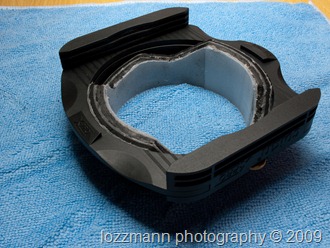
 

LTC_01377

Next I pushed the Cokin X-Pro holder with universal adapter ring attached onto the rig. A nice tight fit with the “springy” foam pushing up against the adapter ring giving it a nice gapless fit to block any stray light from reaching the filters.


LTC_01378

Next I slipped the rig with the Cokin X-Pro holder onto my 14-24mm lens. I also made sure that I could slide it backwards and forwards along the lens with ease. This is to minimise vignetting depending on whether I am using 1 or 2 filters.

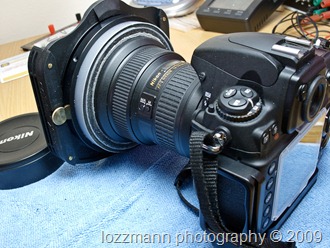
LTC_01396

LTC_01402

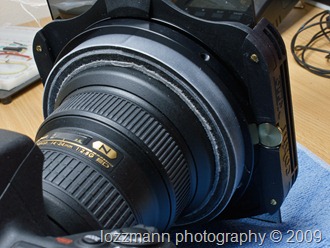
I then installed my Cokin ND8 Grad filter into the holder and made sure there was no vignetting at 14mm.  This involved taking multiple shots at 14mm and viewing at 100% on my Dell 24” screen to make sure.

LTC_01407


If you loosen the brass screws on either side of the holder you can easily rotate the Cokin X-Pro holder. Great for when you are switching from landscape to portrait mode or vice-versa, especially when you are using a ND Grad filter.
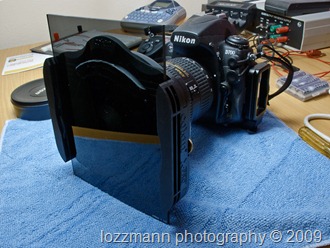
LTC_01410


Front and side view of the ND8 Grad filter and Cokin X-Pro holder attached to my Nikon D700. Please excuse the mess in the background.

LTC_01413


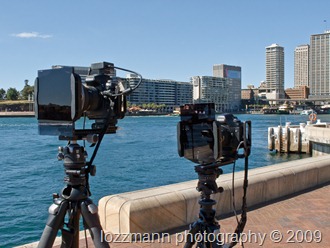
Out on location for testing with his best mate the Canon 5D. If you own the 16-35mm Mk. II lens, you won’t have an issue with the Cokin X-Pro filter holder like I did. Cokin has an 86mm adapter to screw onto the front of this lens.
LTC_01424

In this setup I had 2 x filters (Cokin ND4 and ND8 Grad) stacked for testing. I managed to get up to 17mm without vignetting using the 2 x filters. With just a single filter I was able to get 14mm with zero vignetting on my Nikon D700 which is a FX or full frame DSLR.


Examples

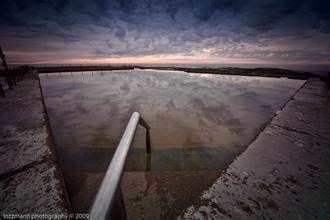
Here are some examples shots using the Cokin X-Pro filters. The first shot was taken using just the Cokin ND8 Grad filter. The second shot was taken by stacking two filters (Cokin ND4 and ND8 Grad).

Bronte Beach


LT3_04119

Details: ISO 200 | 14mm | 10s @ f/22 – Using 1 x Cokin ND8 Grad. filter.

Mona Vale Beach
LT3_05752-Edit
Details: ISO 200 | 17mm | 2.5s @ f/22 – Stacked Cokin ND4 & ND8 Grad. filters.