2009-05-17

Eden Gardens - Macro Photography

It's another lovely sunny Sunday morning here in Sydney. Time for more macro photography so I headed out to Eden Gardens in North Ryde to get some nice flower shots and hopefully shots of some creepy crawlies. Unfortunately, there wasn't any.


I am still trying to improve my macro technique, especially with the bee shots. Most of them were not usable. I need to learn how to get pin sharp shots of moving bees.

All these shots were taken hand-held with my Nikon D700 and Nikon 105mm macro lens with a dual SB-800 flash set-up.


Anyway, click here if you want to checkout more of my macro shots from Eden Gardens.

2009-05-10

Sydney Botanical Gardens - Macro Photography

It was a beautiful sunny day in Sydney today so I decided to go down to the Sydney Botanical Gardens to work on my macro photography.


I had hoped for more insects but there were only flies, ants, spiders and a couple of bees. There was a nest of wasps but I was to chicken to go near them. I guess the bugs don't like winter too much.

All these shots were taken hand-held with my Nikon D700 and Nikon 105mm macro lens with a dual SB-800 flash set-up. My technique is improving with each outing but still needs quite a lot of work. I have to investigate and find out the best places to take shots of insects.


Click here for more of my macro shots from the Sydney Botanical Gardens .

2009-04-28

Nikon D700 - Light Painting (Night Photography)

We came across this bunker at Malabar, using Google maps, whilst searching for interesting places to shoot in Sydney.

Malabar Bunker - In Daylight

We checked it out during the day time to make sure that the bunker would be an interesting subject and it didn't disappoint. The structure was covered in graffiti both inside and out. It was definitely suitable for some light painting experiments.

Inside the bunker - Entrance

Inside the bunker - first floor

I am glad we checked it out in the daytime as it made navigating to the bunker much easier at night. Here are some of the shots from our light painting experiment.

Malabar Bunker - (Back view) Painted in Portrait

Malabar Bunker - Painted in Portrait

Malabar Bunker - Painted in Landscape

The top floor was "painted" using a Canon 430EX wrapped in purple cellophane and the second floor was "painted" using a Nikon SB-800 with a green gel over the flash head. The external walls of the bunker was "painted" using another Nikon SB-800. The camera aperture was set to f/11 with an exposure time of 3 minutes.

There were 4 of us split into 2 teams, one team would be taking the shots and "painting" the outside of the bunker whilst the other team was up in the bunker "painting" the two floors. The results were satisfactory for first timers and we learnt alot .

Lessons learnt for next time:

  1. Turn head lamp off before walking around and ruining the shots.
  2. Make sure that when the flash fires it is not aimed towards the camera lens.
  3. Bring some real torches with more lumen so we can focus!
  4. Get some proper gels instead of using cellophane for the flashes
  5. Probably fire the flash with less power or less frequently when "painting" the external walls
  6. Increase the exposure time so we can get extended star trails
It was a lot of fun, everyone thoroughly enjoyed ourselves. We have already started making plans for another light painting shoot. All the other guys that weren't that keen to come this time are now chomping at the bit after they saw the results.

2009-04-20

Nikon D700 - Macro Photography

I visited the Mt. Tomah Botanical Gardens in the Blue Mountains yesterday with some photography buddies. The aim of this shoot was to improve our macro photography. This is the first time I have teamed the Nikon 105mm with the D700 and I have to say I am very impressed with the results.

The weather wasn't the best as it was raining intermittently for most of the day. I shot most of the afternoon in the drizzling rain after lunch. I was wet and cold and so was my camera equipment.

Two of the Canon buddies called it quits when the rain started and headed for shelter. Their excuse was that they didn't want the precious Canon 5D to get damaged. I reckon it was them that didn't want to get wet!

They reckon the 5D did not have weather sealing and didn't want water in their cameras. I always assumed that the Canon 5Ds

were water resistant. The other two Canon buddies didn't seem to let the wet weather bother them too much.

Anyway the Nikon D700, 105mm macro lens and SB-800 flash all survived the ordeal.


I am amazed with the sharpness of the Nikon 105mm macro lens. I bought this before the VR version was released.


Click here for more macro photography at High ISO.

Click here if you want to see more of my macro shots.

2009-04-11

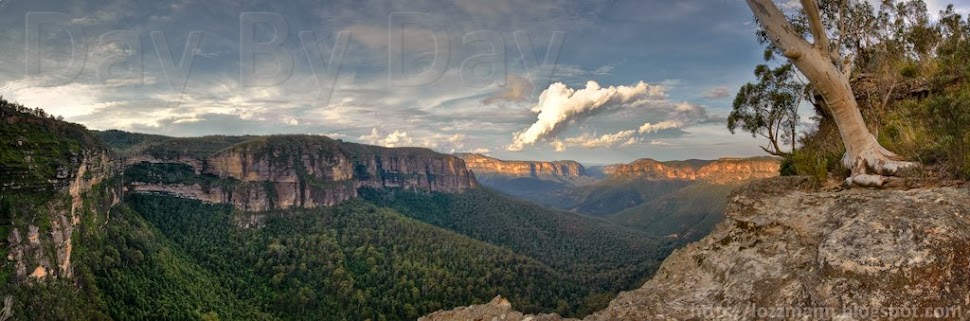
Govetts Leap, Blue Mountains

Here are some photos from my recent trip to Govetts Leap in the Blue Mountains on Good Friday. Not a great idea in hindsight since took us over 2.5 hours, hours to get there as there was a heap of traffic on the road. The trip normally only takes about 1.5 hours. It appears lot of people were trying to get out of Sydney during the Easter break.


We started off at Govetts Leap lookout and then went for a quick hike along the Cliff Top track. It was quite a challenging hike for a very unfit person like me.


It was very tough climbing back up those steps. Finally got back to Govetts Leap at around dusk. Just in time to get the shot below.


If you are interested you can checkout more of my shots here.

2009-03-26

My first attempt at Panoramas

I've always wanted to learn how to do panoramas. For some reason I always thought that it was too damn fiddly so I filed it in the too-hard basket. Anyway my interest was peaked after a friend sent me his attempt at panorama. I noticed quite a few alignment problems, which I later learnt were cause by parallax errors. I wondered if I could do better.

I did a lot of reading on the internet on that topic and there are heaps of info on the causes and how to eliminate it. I first had to wrap my head around terms like nodal point, rotational axis and parallax errors. I later found out that the correct terminology is entrance pupil and not nodal point. There are loads of information and tutorial on how to achieve it.

I was salivating over a pano package from Really Right Stuff (RRS) could not justify paying over USD $360. After some thinking and I realised that I could use my panning BH-40 Pro II ballhead and MPR-192 rail from RRS.


Really Right Stuff MPR-192 rail


Really Right Stuff BH40 Pro II ballhead

Requirements

1. Calculate entrance pupil of lens. The entrance pupil of the lens must be directly above the rotational axis of the tripod to negate parallax errors.

2. Tripod - preferably a sturdy one.

3. Panning ballhead or a panning base. Excellent, the BH-40 has a panning base.

4. Slide rail. Luckily for me I had an old RRS MPR 192 slide rail which I originally bought to do macro photography but was not suitable as the movements were not smooth enough.

Entrance Pupil

This is how I found the entrance pupil of my Nikon 14-24mm. I place my speaker stand in the foreground and align it with a door frame in the background or any straight vertical line. I then look through the view finder and panned the camera left and right and adjust the position of the camera, by moving it either backwards or forwards on the rail. This process is repeated until the foreground and background objects stop moving when panning the camera left and right.

My D700 mounted on the RRS MPR 192 rail. As you can see from the photo above, the entrance pupil for the Nikon 14-24mm is towards the front of the lens roughly where the focus ring is.


The tripod must be dead level. This is the hardest part of the whole exercise, it takes a bit of time and lots of patience. It can be very frustrating especially when perched on a rock. I discovered that the spirit level on my Manfrotto 055PROB was crap. I wasted a few hours scratching my head wondering why I couldn't get the tripod level. I ended up using a two axes spirit level instead.

2-axes spirit level. You can get them on ebay.


Once the tripod is ready, make sure that the ballhead is level. The spirit bubble on the quick release plate is accurate but I double checked using the 2-axes level. Now you are ready to take some shots. Since I had no idea what I was doing I just took multiple shots, anywhere from 3 to 13 shots, in both portrait and landscape mode.

Panorama shot in portrait mode. This one comprise of 3 separate shots.


Panorama shot in portrait mode. This one comprise of 5 separate shots.


Panorama shot in landscape mode. This one comprise of 5 separate shots.


Panorama shot in portrait mode. This one comprise of 8 separate shots.
Click here for a larger view


Panorama shot in portrait mode. This one comprise of 13 separate shots.
Click here for larger view


All the shots were taken with my Nikon D700 and 14-24mm. I use Adobe LR2 and CS4 to do all my adjustments and stitching. I am very please with the results from my first attempt at panoramas. Now I would really keen to do more panoramas and also work to improve my technique.
2009-03-25

Really Right Stuff L-Plate for Nikon D700

I finally received my L-bracket for my Nikon D700 from Really Right Stuff (RRS). It is designed specifically for the Nikon D700. The L-bracket really does hug the contours of the Nikon D700, the fit is perfect. The workmanship is second to none. Absolutely no movement at all when attached, and it keep all the buttons and panels (such as the remote port) accessible. Once mounted on my RRS BH40 ballhead, this thing is rock solid.

Side View


Bottom View


Top View


All RRS camera body plates are Arca-Swiss style quick-release compatible. This is my third L-bracket from RRS, D70, D200 and now the D700. I guess that's a good endorsement. It is not cheap, costs me a total $280 AUD to get it shipped over here. I wished it was cheaper but it is definitely worth the money as you are paying for quality.


Nice and cosy


If you need access to your ports


Tethered in portrait mode


With the slot design it is now possible to shoot tethered. You can plug your usb cable and have the flap opened without fouling the L-plate. Nikon Camera Control Pro 2 supports tethered shooting. I have never tried it but perhaps in the future.


I took it out on the weekend to test it out. Worked like a charm, I am giving it two thumbs up. Highly Recommended.